- Key Takeaways
- Selecting Beef: Tri-Tip vs. Chuck Roast
- Essential Seasonings and Spices
- Must-Have Kitchen Tools and Appliances
- Trimming and Seasoning the Meat
- Slow Cooking and Braising Basics
- Crust Creation Through Searing
- Homemade Sauce Recipe Details
- Straining and Enhancing the Au Jus
- Layering Tactics and Bread Selection
- Cheese Lovers' Paradise
- Southwest Flair
- Cooking Time Considerations and Adjustments
- Maintaining Moisture and Optimal Flavor
- FAQ
- What’s the best cut for tender, juicy results?
- Can I substitute store-bought sauce for homemade?
- How do I prevent the meat from drying out?
- What kitchen tools are essential for this recipe?
- How long can I store leftovers?
- Can I skip searing the meat first?
- What bread holds up best against saucy fillings?
- How do I adjust cooking times for smaller portions?
There’s something magical about a meal that brings people together. Picture this: a Sunday afternoon, laughter filling the kitchen, and the aroma of slow-cooked meat wafting through the air. That’s where our story begins—with a recipe passed down through generations, perfected to create a dish that’s become a dinner-table hero. This isn’t just food; it’s a memory waiting to happen.
At the heart of this recipe lies a simple truth: great meals don’t need complexity. Whether you’re using a tri-tip roast or its flavorful cousin, the chuck roast, the secret is patience. Slow-cooked until it falls apart effortlessly, the meat becomes a canvas for rich, savory flavors. Imagine tender strands soaked in spices, piled high on a soft bun—every bite a harmony of texture and taste.
We’ll guide you through every step, from selecting the right cut to mastering the slow-cooker technique that guarantees juicy results. You’ll learn how to layer flavors like a pro and assemble a sandwich that’s earned its spot as a family favorite. Ready to turn ordinary ingredients into something extraordinary?
Key Takeaways
- Tri-tip or chuck roast creates melt-in-your-mouth shredded meat when slow-cooked
- Family-tested methods ensure crowd-pleasing results every time
- Simple tools transform basic ingredients into gourmet-quality meals
- Flavor-building techniques elevate the entire eating experience
- Versatile recipe adapts to different cooking preferences and occasions
Introduction to Your Pulled Beef Sandwich Journey
Transforming simple ingredients into culinary magic requires just patience and the right technique. This guide walks you through a family-tested method that turns affordable cuts of meat into tender, flavorful masterpieces. Originally crafted for Sunday gatherings, the recipe evolved into a slow-cooker sensation perfect for modern lifestyles.
Your choice of roast makes all the difference. Chuck roast, with its rich marbling, melts into succulent strands when cooked low and slow. “The connective tissue breaks down over hours, creating that fall-apart texture we crave,” explains one seasoned home cook. Pair it with aromatic broth and spices, and you’ve got a foundation for endless meals.
What’s the secret to fork-tender results? Time. Slow cooking at steady heat transforms tough fibers into moist, shred-ready meat. This approach works equally well for weeknight dinners or weekend feasts—just prep ingredients in the morning and let your appliance do the work.
Planning is key for busy households. Batch-cook shredded beef on your day off, then repurpose it throughout the week in tacos, salads, or the star of this guide. With minimal active time and maximum flavor payoff, this recipe proves gourmet meals don’t require chef-level skills.
Choosing the Perfect Cut and Ingredients
Great meals start with smart choices at the butcher counter and spice rack. Your selection here determines whether you’ll get stringy disappointment or fork-tender perfection. Let’s break down what works—and why.
Selecting Beef: Tri-Tip vs. Chuck Roast
Tri-tip wins for convenience—it shreds faster with less cooking time. But chuck roast delivers deeper flavor through its marbled fat. Think of tri-tip as the sprinter and chuck as the marathon runner. Both cross the finish line, but one rewards patience with richer taste.
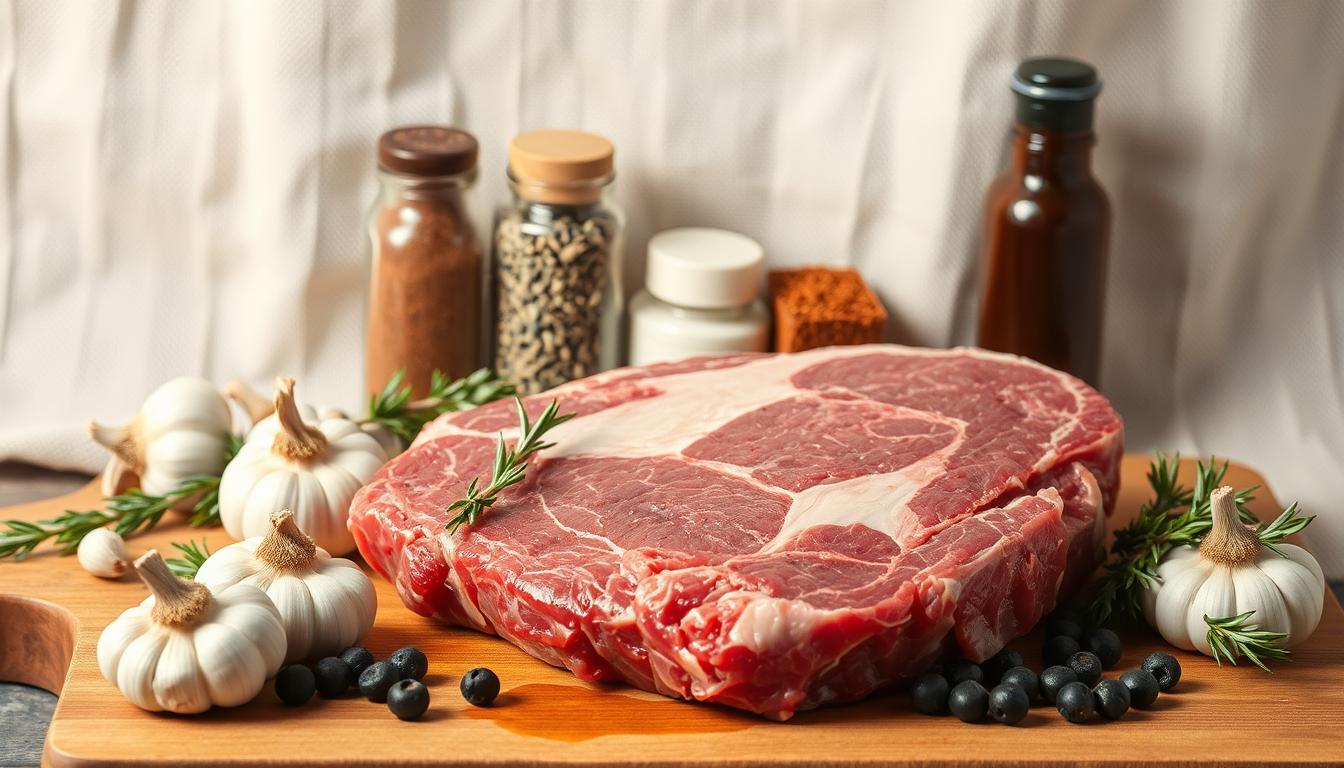
Look for bright red meat with even fat distribution. Trim thick outer layers, but leave some marbling intact. Chuck’s connective tissue needs 6-8 hours to melt into gelatin—the secret to moist shreds. Tri-tip? It’s ready in 4-5 hours but lacks that buttery mouthfeel.
Essential Seasonings and Spices
Montreal steak seasoning forms the backbone here. Its garlic powder, paprika, and cracked pepper create a savory crust. Combine it with real minced garlic for layered aroma. Beef broth amplifies umami while keeping the pot’s contents juicy.
Don’t skip the salt—it’s not just for taste. Proper seasoning helps break down muscle fibers during cooking. A dash of onion powder balances the richness without overpowering. Remember: these ingredients work as a team. Skimp on one, and the whole recipe suffers.
Your spice blend should complement—not mask—the meat’s natural flavors. Test ratios in small batches before committing to a full pot. Once mastered, this combination becomes your flavor blueprint for countless dishes.
Essential Tools and Equipment for Success
Your kitchen arsenal determines whether you’ll fight your ingredients or dance with them. The right tools transform tedious prep into smooth, efficient processes. Let’s explore what separates frustrating meals from those “wow” moments at the dinner table.
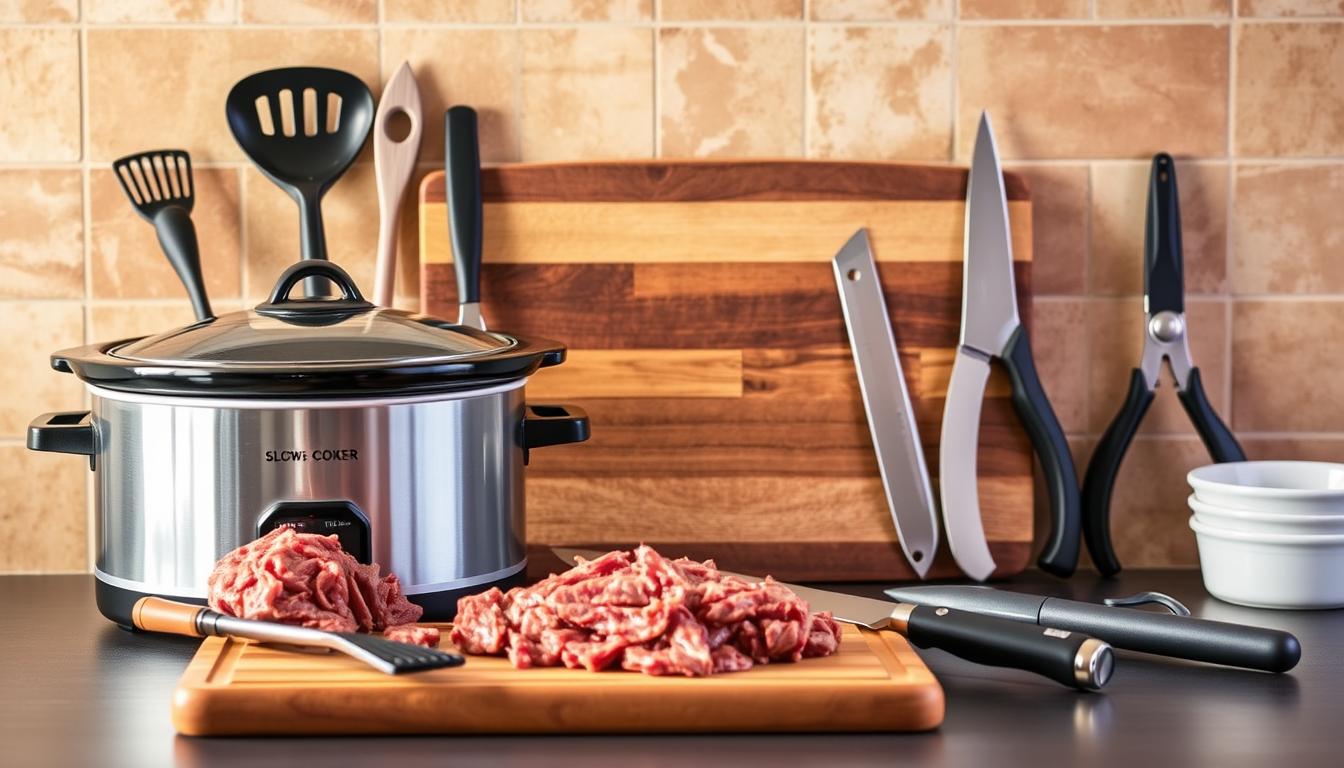
Must-Have Kitchen Tools and Appliances
A heavy-duty slow cooker forms the backbone of this operation. Look for models with programmable timers and even heat distribution. “The difference between good and great shredded meat often comes down to temperature consistency,” notes Texas pitmaster Laura Mendez.
Complement your cooker with these essentials:
- Cast iron skillet: Creates caramelized crusts through high-heat searing
- Dutch oven: Ideal for braising when oven-cooking preferred
- Insulated gloves: Protect hands during hot liquid transfers
| Tool | Key Feature | Best For |
|---|---|---|
| Slow Cooker | 6-quart capacity | Hands-off cooking |
| Instant Pot | Pressure cook function | Speed + versatility |
| Dutch Oven | Enameled interior | Oven-to-table serving |
Make sure your equipment handles long cooking times without warping. Cheap pots often develop hot spots that dry out meat. For shredding, wide-based metal tongs outperform flimsy forks, preserving the meat’s texture.
Proper tools slash active prep time by 40% according to Cook’s Illustrated tests. They also ensure safety when handling simmering liquids. Invest once, and these workhorses will serve you through countless meals.
Prepping the Beef for Maximum Flavor
The foundation of unforgettable meals lies in careful preparation. Your approach to handling ingredients before heat hits the pan determines whether flavors sing or fall flat. This stage transforms tough cuts into tender masterpieces through smart techniques anyone can master.
Trimming and Seasoning the Meat
Start by removing thick fat caps while preserving marbled veins. Marbling melts during cooking, basting your meat from within. Use sharp shears for precision—hack jobs leave uneven textures.
Create a flavor crust with Montreal seasoning and garlic powder. Rub spices into every crevice like you’re massaging flavor into the fibers. “The friction helps seasonings penetrate deeper,” says grillmaster Carla Simmons. Let the rub rest 15 minutes before cooking.
| Cut Type | Fat Content | Trimming Method |
|---|---|---|
| Chuck Roast | High | Remove surface fat, keep marbling |
| Tri-Tip | Moderate | Light trim, retain moisture pockets |
| Brisket | Very High | Trim to ¼-inch even layer |
Morning prep pays off. Trim and season your cut early to let flavors meld. This day-ahead strategy reduces evening stress and improves spice absorption. Properly prepped meat needs minimal babysitting during cooking.
Remember: over-trimming creates dryness, while under-trimming leaves chewy bits. Balance is key. Pair smart prep with quality ingredients, and your slow cooker will handle the rest.
Cooking the Beef to Perfection
Mastering heat and timing unlocks your meat’s full potential. Whether using a slow cooker or Dutch oven, the goal remains the same: transform tough fibers into succulent strands through controlled temperature. This stage separates chewy disappointments from crowd-pleasing meals.
Slow Cooking and Braising Basics
Low heat works miracles over 7-8 hours. Set your appliance to 275°F—the sweet spot where collagen melts into gelatin. “This gradual breakdown creates that signature fall-apart texture,” explains Chef Michael Sullivan. Keep the liquid level halfway up the meat using broth infused with fresh garlic.
| Method | Temperature | Time | Liquid Ratio |
|---|---|---|---|
| Slow Cooker | Low (200°F) | 8 hours | 2 cups broth |
| Dutch Oven | 300°F | 6 hours | 3 cups liquid |
Check moisture levels every 90 minutes. Add ¼ cup warm broth if the pot looks dry. Resist stirring—it breaks delicate strands. The magic happens when steam circulates undisturbed.
Crust Creation Through Searing
A sizzling sear locks in juices and builds flavor foundations. Heat oil until it shimmers before adding seasoned meat. That golden-brown crust isn’t just eye candy—it’s the Maillard reaction at work. This non-negotiable step adds depth to shredded beef that slow cooking alone can’t achieve.
Use a cast-iron skillet for even heat distribution. Sear all sides for 3 minutes each until caramelized. Deglaze the pan with ½ cup red wine, scraping browned bits into your cooking liquid. This technique amplifies savory notes in every bite.
“Searing transforms good meat into extraordinary meals—it’s the difference between eating and experiencing.”
Combine these methods, and you’ll achieve fork-tender results every time. Trust the process—your patience gets rewarded with melt-in-your-mouth texture that elevates any dish.
Creating the Perfect Sauce and Au Jus
The final flourish of flavor comes from mastering your liquid gold. A great sauce does triple duty—marinating, basting, and dipping—while au jus adds that restaurant-quality finish. Start with quality beef broth as your foundation, then layer flavors like a flavor architect.
Homemade Sauce Recipe Details
Combine 1 cup ketchup, ¼ cup brown sugar, and 2 tablespoons barbecue sauce in your cooker. Whisk in 2 cups beef broth, ½ cup red wine, and 1 diced onion. “The acidity cuts through richness while caramelized onions add sweetness,” notes Chef Elena Martinez.
Simmer the mixture for 20 minutes until thickened. Stir in 1 teaspoon garlic powder and ½ teaspoon salt. For depth, add ¼ cup shredded meat drippings. Taste-test as you go—balance is key. Too tangy? Add honey. Too sweet? Splash in vinegar.
Straining and Enhancing the Au Jus
Pour cooking liquids through a mesh strainer into a fat separator. Discard solids but keep those flavorful juices. Skim excess fat using the separator’s spout. Return the clear liquid to the pot with ½ cup broth.
Boost flavor by stirring in reserved meat bits. Heat gently—never boil—to preserve delicate textures. Adjust seasoning with a pinch of salt if needed. Serve warm in ramekins for dipping or drizzle directly over your creation.
“Great sauces whisper secrets—the caramelized onion’s sweetness, the broth’s umami, the wine’s sharpness. When they harmonize, magic happens.”
Building Your Ideal Pulled Beef Sandwich
Crafting a memorable meal lies in the details of assembly. The right combination of textures and flavors transforms ingredients into an experience worth savoring. Let’s explore how to construct a handheld masterpiece that delights with every bite.
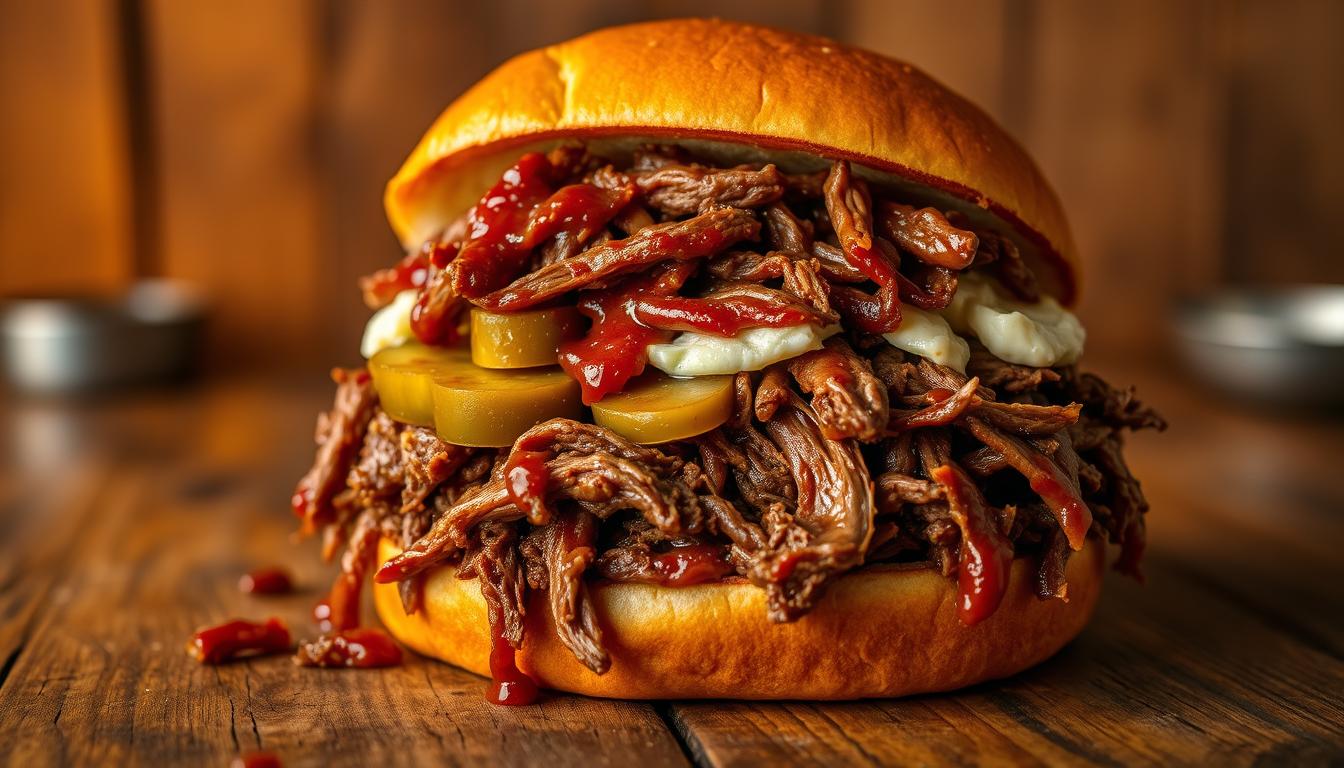
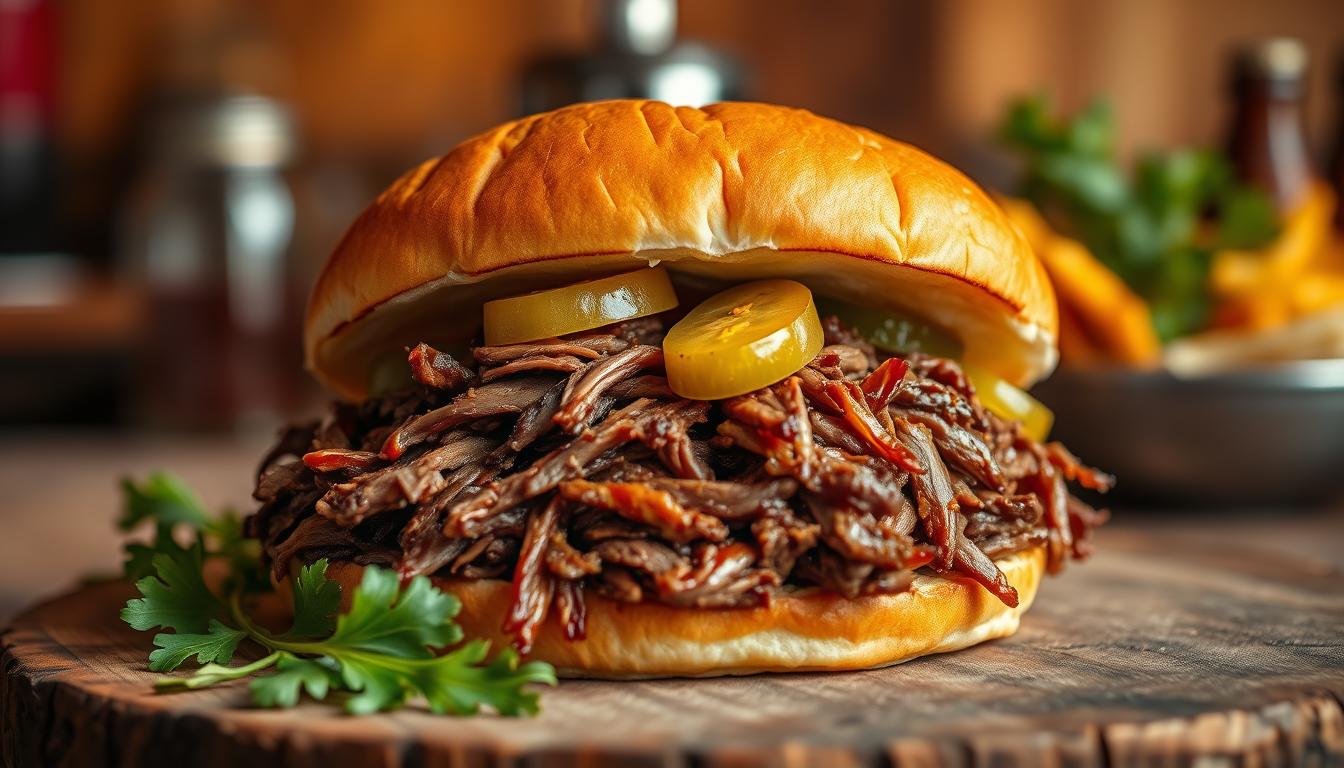
Layering Tactics and Bread Selection
Start with a sturdy foundation. Toasted ciabatta or fresh hoagie rolls provide structural integrity while adding subtle crunch. Their porous interiors absorb juices without becoming soggy—a critical factor for maintaining texture.
| Bread Type | Crust Texture | Best For |
|---|---|---|
| Ciabatta | Crispy exterior | Hearty portions |
| Hoagie Roll | Soft yet firm | Classic presentation |
| Brioche Bun | Buttery soft | Rich flavor pairings |
Layer strategically for balanced bites. Spread melted cheese directly against warm bread to act as a moisture barrier. Pile shredded meat evenly across the surface, then top with caramelized onions or mushrooms. Finish with a light drizzle of au jus for enhanced richness.
Keep leftover cooking liquids handy for dipping. Serve them warm in small bowls alongside your creation. This adds interactive enjoyment while amplifying the savory notes in each component.
“Great meals balance texture and taste—crunchy against tender, savory with sweet. Master this interplay, and every mouthful becomes an event.”
Proper assembly elevates home cooking to gourmet status. Follow these techniques, and watch ordinary ingredients become extraordinary.
Variations and Serving Suggestions for Pulled Beef Sandwich
Reinvent your meals with clever twists that keep taste buds guessing. Our base recipe serves as a launchpad for culinary creativity, letting you customize based on mood or occasion. Whether hosting game night or meal prepping for the week, these ideas transform your shredded meat into multiple crowd-pleasers.
Cheese Lovers’ Paradise
Melt provolone over warm meat for gooey goodness that stretches with every bite. Pepper jack adds subtle heat when layered under fresh avocado slices. For ultimate indulgence, mix shredded cheddar directly into the meat before piling onto toasted buns.
Southwest Flair
Top your creation with tangy lime slaw and chopped cilantro. A drizzle of chipotle mayo brings smoky depth, while pickled jalapeños offer crunchy contrast. Serve with tortilla chips for dipping into leftover au jus.
| Storage Method | Duration | Reheating Tip |
|---|---|---|
| Refrigerator | 4 days | Steam with broth |
| Freezer | 3 months | Thaw overnight |
Batch cooking becomes your secret weapon. Portion cooled meat into freezer bags with cooking liquid—this locks in moisture. When ready, simmer frozen chunks in a skillet until heated through. “Leftovers taste better when frozen with their juices,” shares meal prep expert Diego Ramos.
Pair your main dish with crunchy veggie sticks or sweet potato fries. Transform extra meat into loaded nachos or hearty salads. The possibilities multiply when you view each batch as a foundation rather than a single meal.
Key Tips and Tricks for a Juicy Pulled Beef Sandwich
Perfecting your technique makes all the difference between good and exceptional results. These pro strategies ensure tender, flavorful outcomes whether you’re feeding a crowd or meal prepping for the week.
Cooking Time Considerations and Adjustments
Your appliance and meat cut determine ideal cooking durations. Chuck roast needs 7-8 hours on low heat, while tri-tip reaches perfect shreddability in 5-6 hours. Always account for your slow cooker’s heating patterns—older models might require extra minutes.
| Cut Type | Minimum Hours | Doneness Check |
|---|---|---|
| Chuck Roast | 7 | 203°F internal temp |
| Tri-Tip | 5 | 195°F internal temp |
| Brisket | 9 | Probe tender test |
Use a digital thermometer to avoid guesswork. Insert it into the thickest part, avoiding fat pockets. If time runs short, increase heat to high for the final hour—but monitor closely to prevent drying.
Maintaining Moisture and Optimal Flavor
Keep meat succulent by managing liquid levels. Start with 2 cups broth, adding ¼ cup warm liquid every 90 minutes if needed. After shredding, mix in reserved au jus to rejuvenate texture.
Shred with two forks using parallel motions—this creates uniform strands that hold sauce better. For flavor boosts, stir in caramelized onions during the last hour or add cracked pepper to finished meat.
“Texture tells the story. Proper shredding lets every strand soak up flavor while maintaining that satisfying mouthfeel.”
Small adjustments create big impacts. A garlic clove rubbed on toasted buns or a dash of smoked paprika elevates each bite. Remember: patience during cooking and attention during prep yield unforgettable meals.
Conclusion
Every great meal starts with intention—from selecting marbled chuck roast to mastering low-and-slow techniques. You’ve learned how garlic powder amplifies savory notes and why monitoring liquid levels prevents dryness. Those patient cooking hours transform tough cuts into tender strands that melt on your tongue.
Remember: success lies in details. Properly skimmed fat ensures rich flavor without greasiness. Store leftovers in airtight containers with reserved juices to maintain moisture. This versatile recipe adapts to tacos, salads, or hearty bowls—perfect for busy weeks.
Experiment with bold spices or tangy slaws while honoring the core method. Whether hosting friends or meal prepping, your attention to technique guarantees crowd-pleasing results. Now armed with pro strategies, you’re ready to create meals that turn ordinary dinners into memorable experiences.